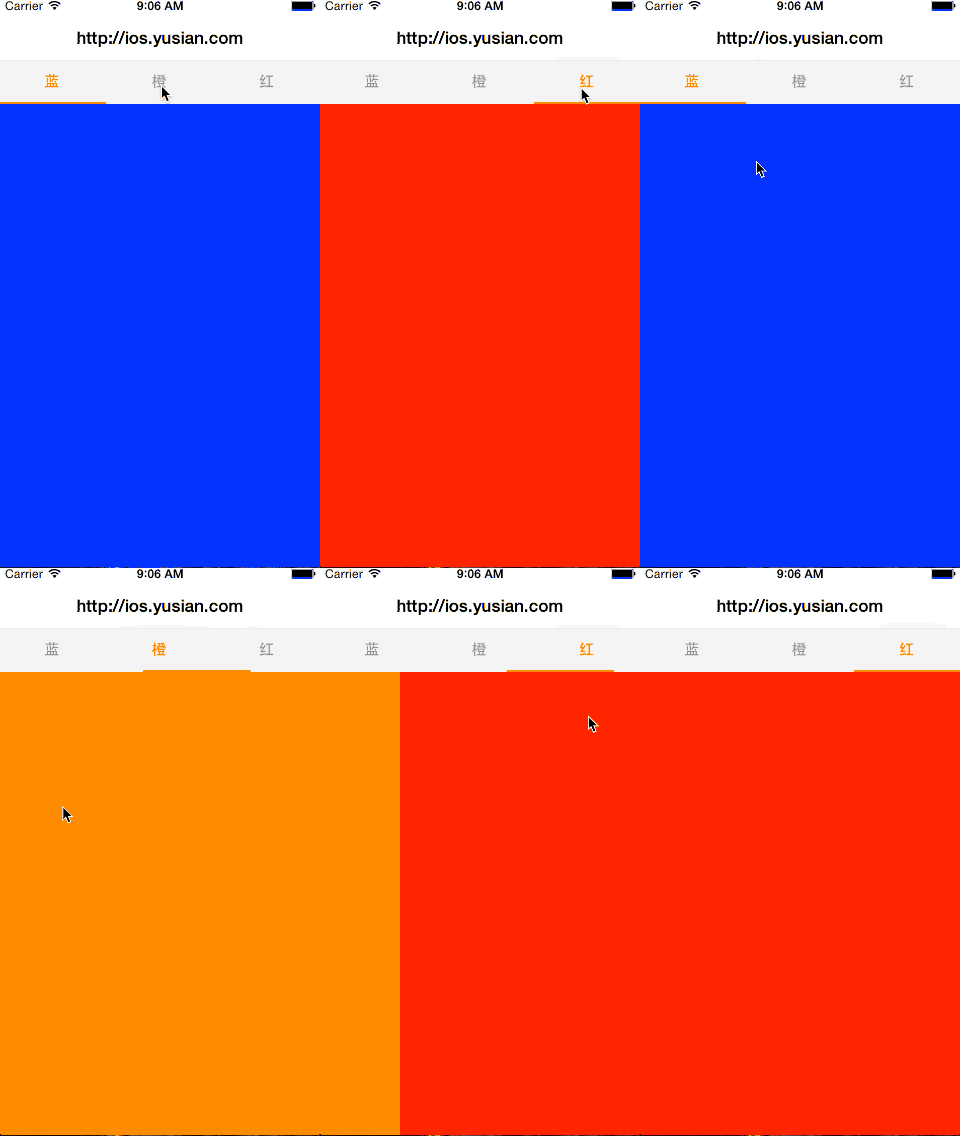
一、先上效果图,看了自然就明白

二、设计思路
1、如何实现类似功能或效果呢,首先顶部标签切换效果在前面已有专门的贴子做了详细说明,参考:一行代码搞定淘宝视图切换效果
2、下面视图切换的基本思路是根据上面标签的数目创建对应多个View,放到ScrollView上面,通过pageingEnable属性分屏切换
3、通过ScrollView的代理方法,监听当前ScrollView的滚动状态与上面标签栏联动
4、同样,上面标签栏点击事件动态改变ScrollView的contentOffset,使得下面视图与标签保持对应一致
三、使用说明
1、该控件包含三个类:SASwitchBar、SASwitchView、SASwitchCtrl,分别为标签栏、视图、控制器,前两个类为视图负责展示并监听事件,最后一个类负责事件处理与视图控制;
2、使用时只需要新建一个控制器并继承自SASwitchCtrl即可,然后设置SASwitchBar的items数组,再设置SASwitchView的视图数组,搞定!
3、示例:
1 2 3 4 5 6 7 8 9 10 11 12 13 | // 设置标签选项卡 self.switchBar.items = @[@"蓝", @"橙", @"红"]; // 创建三个切换演示视图 UIView *blue = [[UIView alloc] init]; blue.backgroundColor = [UIColor blueColor]; UIView *orange = [[UIView alloc] init]; orange.backgroundColor = [UIColor orangeColor]; UIView *red = [[UIView alloc] init]; red.backgroundColor = [UIColor redColor]; // 添加演示视图 self.switchView.views = @[blue, orange, red]; |
四、关键代码
SASwitchView.m
1 2 3 4 5 6 7 8 9 10 11 12 13 14 15 16 17 18 19 20 21 22 23 24 25 26 27 28 29 | #import "SASwitchView.h" @implementation SASwitchView - (void)setViews:(NSArray *)views { _views = views; CGFloat width = [[UIScreen mainScreen] bounds].size.width; // 在视图数组赋值时,同时整理各视图的布局,主要是x/y坐标,此时还不能确定视图大小 for (int i = 0; i < self.views.count; i++){ UIView *view = self.views[i]; view.frame = (CGRect){width * i, 0, width, 0}; [self addSubview:view]; } self.contentSize = (CGSize){width * views.count, 0}; } - (void)setFrame:(CGRect)frame { [super setFrame:frame]; // 外部给视图设置大小时,同时调整内部子视图,保持子视图与父控制大小一致 for (UIView *view in self.subviews) { CGRect rect = view.frame; rect.size.height = frame.size.height; view.frame = rect; } } @end |
SASwitchCtrl.m
1 2 3 4 5 6 7 8 9 10 11 12 13 14 15 16 17 18 19 20 21 22 23 24 25 26 27 28 29 30 31 32 33 34 35 36 37 38 39 40 41 42 43 44 45 46 47 48 49 50 51 52 53 54 55 56 57 58 59 60 | #define kSASwitchBarH 44 #import "SASwitchCtrl.h" @interface SASwitchCtrl () <SASwitchBarDelegate, UIScrollViewDelegate> @end @implementation SASwitchCtrl #pragma mark - 初始化方法 - (instancetype)init { if (self = [super init]) { self.switchBar = [[SASwitchBar alloc] init]; self.switchView = [[SASwitchView alloc] init]; self.switchView.autoresizingMask = UIViewAutoresizingFlexibleBottomMargin; [self.view addSubview:self.switchBar]; [self.view addSubview:self.switchView]; } return self; } - (void)viewDidLoad { [super viewDidLoad]; self.edgesForExtendedLayout = UIRectEdgeNone; self.switchView.showsHorizontalScrollIndicator = NO; self.switchView.pagingEnabled = YES; self.switchBar.delegate = self; self.switchView.delegate = self; } - (void)viewWillAppear:(BOOL)animated { [super viewWillAppear:animated]; { CGFloat w = self.view.frame.size.width; CGFloat h = self.view.frame.size.height - kSASwitchBarH; self.switchBar.frame = (CGRect){0, 0, w, kSASwitchBarH}; self.switchView.frame = (CGRect){0, kSASwitchBarH, w, h}; } } #pragma mark - 代理方法 // 上部标签栏事件处理 - (void)switchBar:(SASwitchBar *)switchBar seletedIndex:(NSInteger)index { // 标签点击第几个,scrollView的offset即跳转到第几屏,并以动画形式转场 CGPoint offset = (CGPoint){self.view.frame.size.width * index, 0}; [UIView animateWithDuration:0.3 animations:^{ self.switchView.contentOffset = offset; }]; } // scrollView代理方法 - (void)scrollViewDidEndDecelerating:(UIScrollView *)scrollView { int page = scrollView.contentOffset.x / self.view.frame.size.width; self.switchBar.selectedIndex = page; } @end |
五、Demo下载:SASwitch